The Abyss Raid Argos is Tier 3 endgame content in Lost Ark, which drops Tier 3 Accessories, Ability Stones, Cards, and many materials. After completing the dungeon, you can use Lost Ark gold to get additional loot. To clear this dungeon, you have to go through three phases. Today we will share a guide for phase 1 and phase 2. Thank you, TenTen, for the amazing video.
Phase 1
Required Item Level: 1370
There is not too much teamwork involved in phase 1, so individual performance is relatively important. Below are the basic attack patterns and safe zones when fighting in phase 1.
Basic Attack Patterns
Sun/Moon Circle
At the beginning of the fight, your party will be assigned either a moon or a sun affix, which will appear as a purple circle or a yellow circle under your feet. Keep track of this throughout the entire fight, as all the major attacks will involve either sun or moon mechanics.
For example, for this giant AoE attack that is purple-colored, it means party members with the moon affix can safely stand in this circle without taking damage. However, if you're a sun party, walk away from the circle.
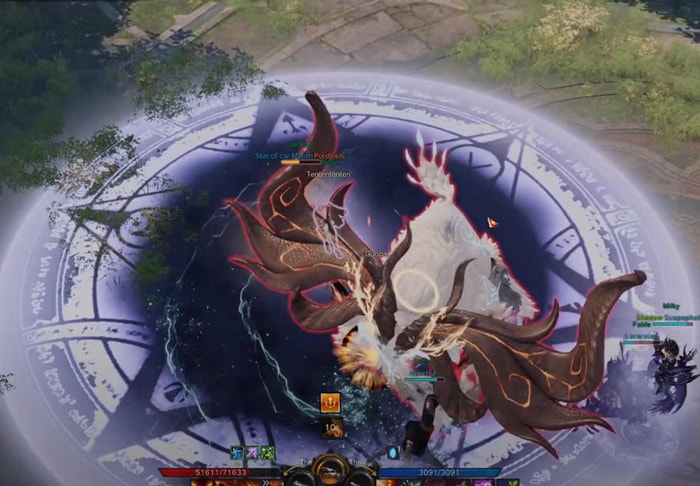
Sun/Moon Ring
This also applies to this double ring circle.
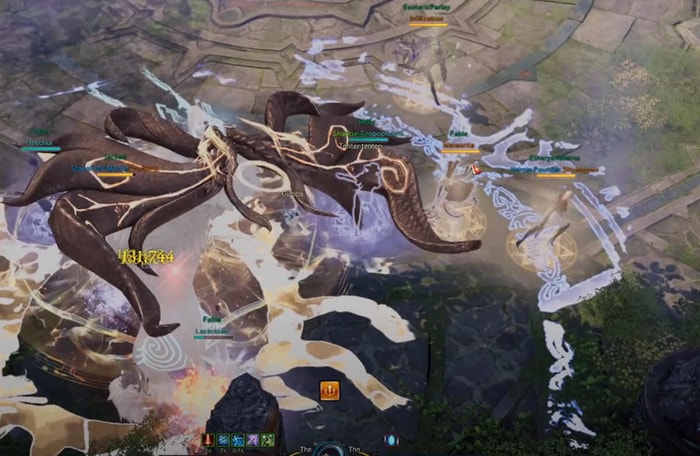
So head to the one corresponding to your color. If you are a moon party in this case, head outside. However, the thing to note is that he'll switch the color around every time he does this. So next time, the moon will be the inside circle.
Orbs Pattern
Sometimes the boss likes to spawn these balls.
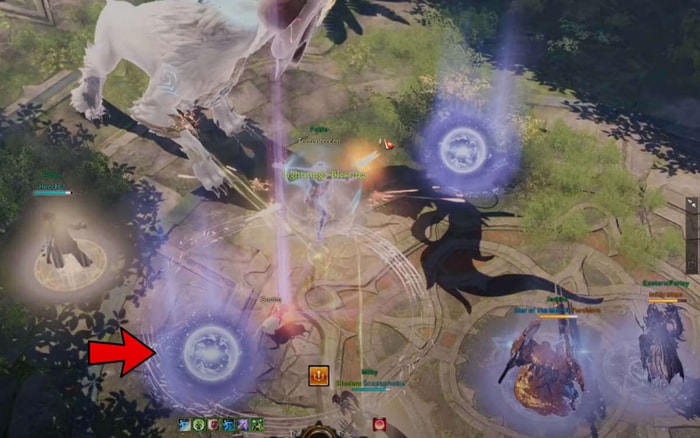
The party members with the corresponding affix or color must consume these balls because otherwise, they will explode. Each member can only collect one ball at a time; two or more will cause high damage.
Pizza Pattern
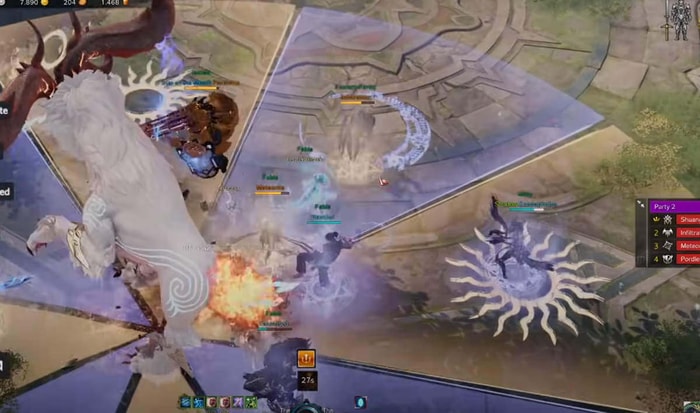
Argos will roar and divide the room around him into Sun and Moon slices, so go to your colors. He will do this about two to three times, so move quickly.
Ring Pattern
He will summon a giant ring.
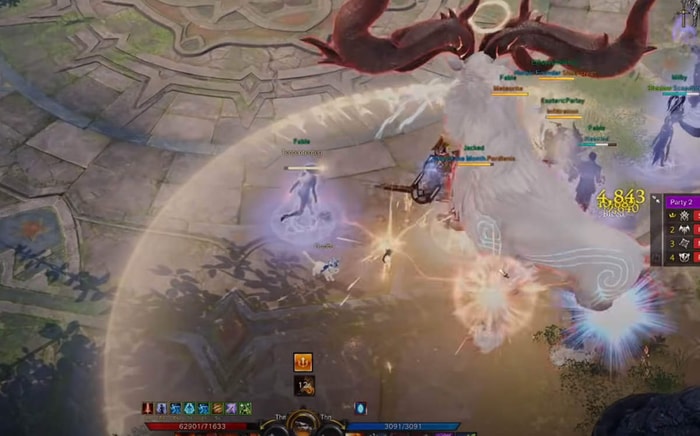
If you are the opposite color of the ring, then you will have a meter above your head. Make sure not to let this meter run out because otherwise, you will take a lot of damage and most likely die. Exit the ring to remove the meter, and then you can go back in.
Safe Zones
Argos will create eight safe zones. Moons are always close to him, and suns are further. Just assign your party member with a corresponding spot.
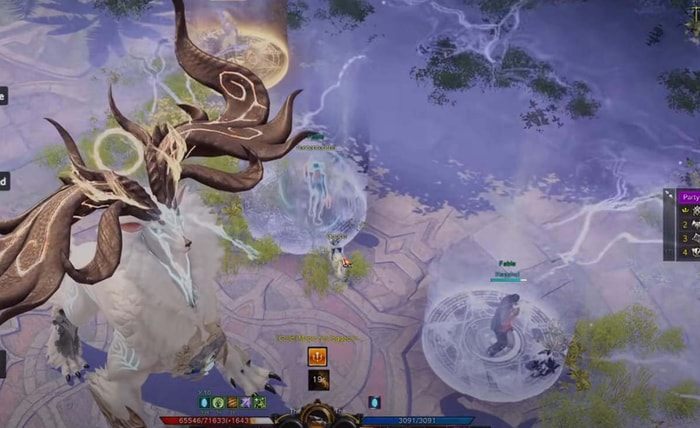
After this, the boss will create a dial right under him, and at this point, your entire party should stop attacking and wait for the dial to run out.
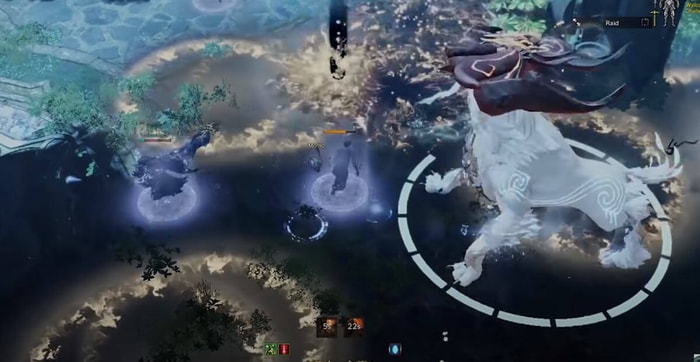
After this mechanic, the affix assigned to you will change. So if you're previously a moon, you will now be a sun and vice versa.
Phase 2
Required Item Level: 1385
Argos Phase 2 relies on team cooperation heavily. And except Argos, there are mini-bosses you need to defeat.
Two Parties
Shortly after the fight start, your team will be split into two parties, one of which will be the sun party and the other will be the moon party. This does not change throughout the fight. And the sun party will head to the Sky Garden to fight the mini-boss, while the moon party will continue fighting Argos.
Note: the sun party will require heavy destruction, so you should bring destruction bombs on every member, while the moon party will require high damage as well as staggers, so you should be putting classes like Berserker or Sorcerer into your party or just put high gear score people in general.
Argos Attack Patterns
Argos will have similar attack patterns as phase one, like the pizza pattern. There are also some additional patterns, like this rock pattern, and you can dodge just by running in a straight line.
Sun Mini-Boss Attack Pattern
For the mini-boss in the sun room, he has relatively simple patterns, such as this long tail swipe.
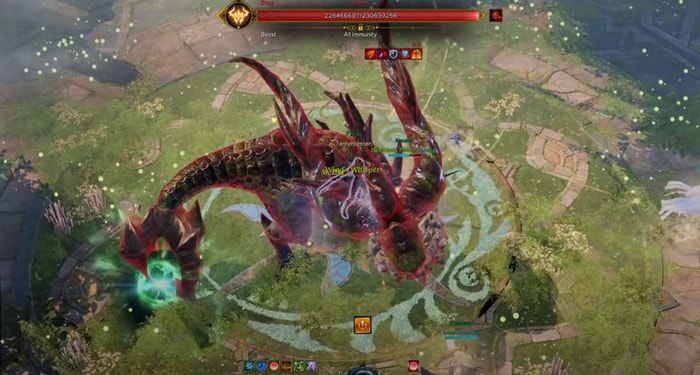
Also, watch out for the green things that he spawns either on the ground or from the sky, as these things will not only do damage to you but will also stun you if you get hit by two of them.
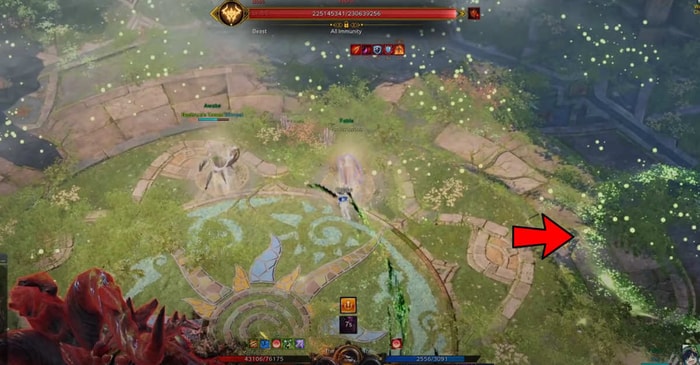
Whenever you knock the boss down, a weak spot will be exposed. Destroy this weak spot as fast as possible, as the amount of time that allows you to do this is very low, which is why you have to bring destruction bombs. If you fail to destroy the weak spot, the boss will enrage, which will make its attack much more deadly.
Laser Signal from Argos – Communications Are Important
Argos will sit down and fire a laser into the sky, indicating that the mechanics have begun. It will then create a dial under itself, which serves as a timer for the current mechanics.
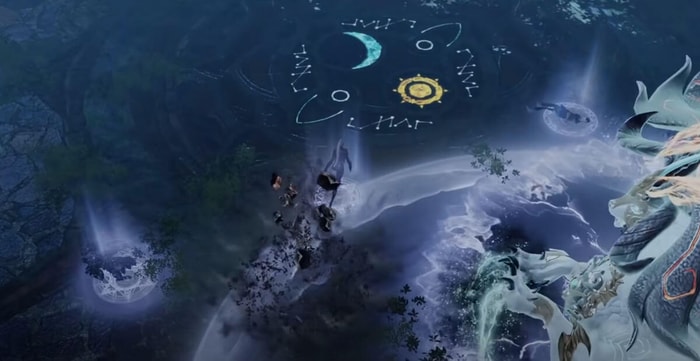
At the same time, one of your party members from the sun room must then run to the top right of the Arena and look over the cliff. Here you will see a pattern that will be only visible for your party. And then report the pattern back to the moon party to avoid a party wipe.
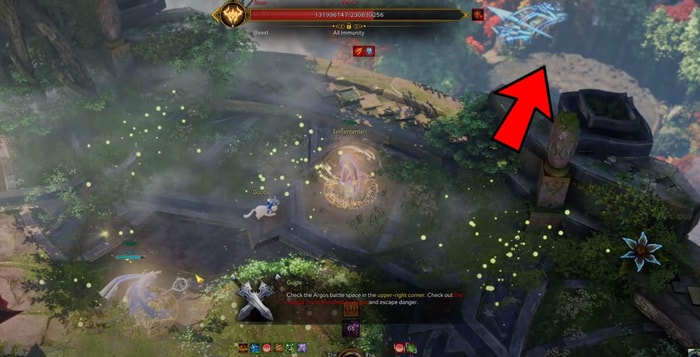
There is a total of six different patterns that denote different things.

These three patterns show the moon party which position they should stand at in the Arena fighting Argos until the dial under him is fully finished. From left to right:
Pattern 1 has an arrow pointing to a location where the team must stand at. In this case, this is the top left of the map.
Pattern 2 indicates that the team must stand in the center circle of the map.
Pattern 3 means that the team must stand in the outer area of the map.
For the rest of the three patterns, from left to right:

Pattern 1 means the sun party needs to stand in the center of the Arena when the dial under Argos fully finishes.
In pattern 2, orbs will spawn around Argos, and the moon party must collect all of them before the timer runs out.
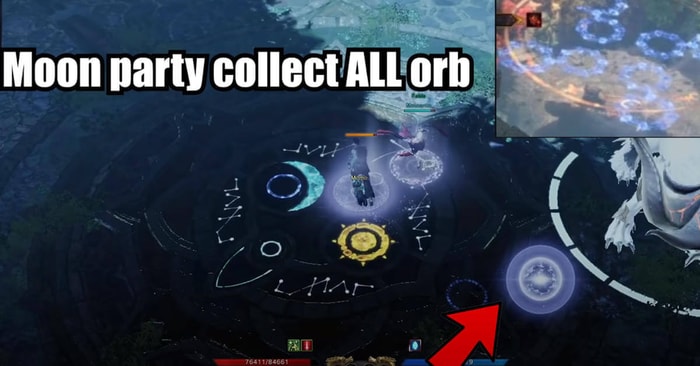
In pattern 3, these circles will spawn across the four corners of the map at the Argos battle area, so members of the moon party must stand in the circles and wait for them to turn purple and collect stacks.
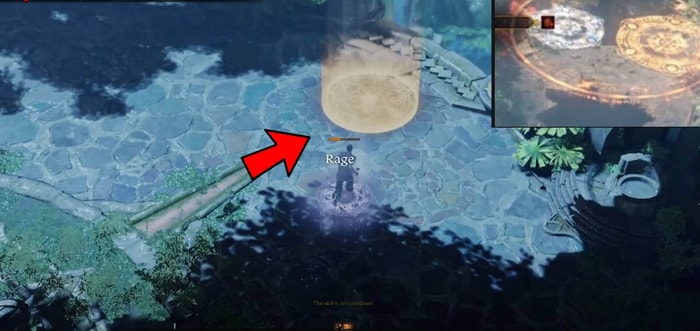
Once you max stacks, hit the Argos to transfer them over. Do this until the dial under the boss turns into a moon.
Do these patterns until you can defeat the mini-boss in the sun room. You will then be transported back to the main area to join with the rest of your team to fight Argos.
Moon Mini-Boss Attack Pattern
Then the moon party will be transported by Argos to fight another mini-boss, which is the second half of the battle. The most important thing here is that you should try to burst the boss down as fast as possible, using stuff like dark bombs or awakening. Try to burst the boss to 70% within 1:30 so that he does not do the wipe mechanics. If you fail to do so, then the sun party can destroy these totems that are scattered across the map, which will be displayed on your mini-map.
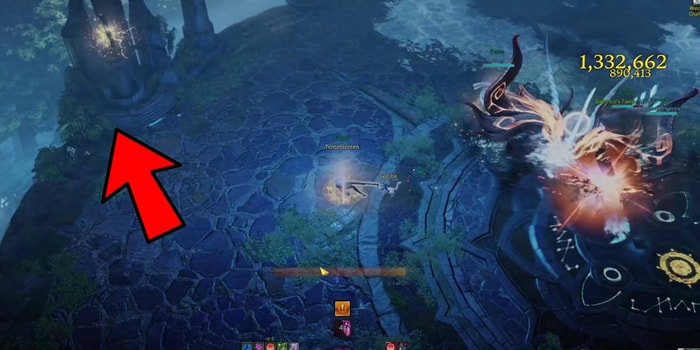
Destroying these will not only remove the movement speed debuff on the moon party but will also prevent the wipe mechanics. But bursting the boss down is much easier, which is also why the moon party should bring high burst damage classes.
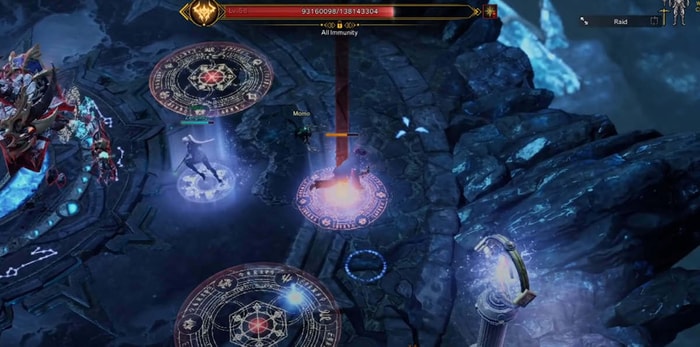
If you see this red pillar above your head, then four safe spots spawn across the Arena. Each party member must take one of each within 3 seconds, or otherwise, a high damage shockwave will be dealt to your entire party.
The moon mini-boss will disappear and hide under the ground while a mini mini-boss will take place instead, who does not take a lot of damage but can be staggered. When you fully deplete the stagger bar, he will take much more damage. Once you have staggered, the mini mini-boss will die very quickly, and the main mini-boss will reappear. This is your opportunity to heavily burst the boss down.
Once he has passed the threshold of 30%, he will go into hiding once again and summon the mini mini-boss, and you just repeat the process above. Once the moon party has successfully defeated the moon mini-boss, they will then all be transported back to the main Arena to have a final showdown with Argos once again. The good news is that Argos will be really low at this point with just one or two attacks, so you should be able to finish the fight very quickly.
Stages You Go Through in Phase 2:
All players will fight Argos together for a short time.
The sun party will be teleported to Sky Garden to fight the mini-boss.
Once this mini-boss is defeated, the sun party will come back to the main Arena fighting Argos.
Then the moon party will go to fight the moon mini-boss.
After the boss is defeated, they come back to Argos, and all eight players fight together till the end.
Related Links: https://www.mmogah.com/news/lost-ark/lost-ark-abyss-raid-guide-how-to-complete-argos-phase-3-quickly
https://www.mmogah.com/news/lost-ark/lost-ark-legion-raid-guide-how-to-complete-valtan-phase-1
