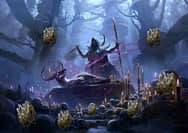
The Immortal Smith of Kitava Warrior Build is a shining testament to resilience and raw power in PoE 2, Dawn of the Hunt. In this guide, we'll delve deep into its mechanics, offering you step-by-step insights into gear, skills, and playstyles that will help you master this build and dominate any league or encounter.
Equipment
Budget
For low-tier maps: It costs about 80 Exalted Orbs
For mid-tier maps: It costs about 150 Exalted Orbs
For high-tier maps: It costs about 530 Exalted Orbs
Rare Item Mods
Physical Damage
Fire Resistance
Attack Speed
Chaos Resistance
+Level to Melee
Armour
Life
Strength
Recommended Runes
Armour
Armour
Fire Resistance
Chaos Resistance
Maximum Life
Weapon
Physical Damage
Rare Items (Option)
Vengeance Blast Massive Greathammer
Golem Roar Sacred Maul
Demon Emblem Glowering Crest Shield
Miracle Grip Commander Gauntlets
Gloom Claw Gleaming Cuffs
Rare Items
Chimeric Salvation Divine Crown
Victory Urge Bulwark Greaves
Rune Turn Topaz Ring
Beast Idol Jade Amulet
Powerful Option items
The Surrender
If you have more currency, I highly recommend getting this shield; it will recover your life when you block a hit. With "75% block chance" you are almost immortal.
Infernoclasp
This unique belt is great for this build. It grants 5% to maximum fire resistance, up to 20 strength, and up to 40% fire resistance.
Body Armour
Superior Ornate Plate
Flask
Life: Potent Ultimate Life Flask of the Foliage
Mana: Substantial Ultimate Mana Flask of the Practitioner
Charm
Analyst's Thawing Charm of the Mixologist
Analyst's Antidote Charm of the Mixologist
Clinician's Stone Charm of the Apprentice
Attributes
Str 560
Dex 20
Int 20
Gems
Leap Slam (Level 10)
This skill is the one we use to prime our enemies for stuns, and this is important to make our huge explosions.
Brink – Martial Tempo – Overpower – Rage
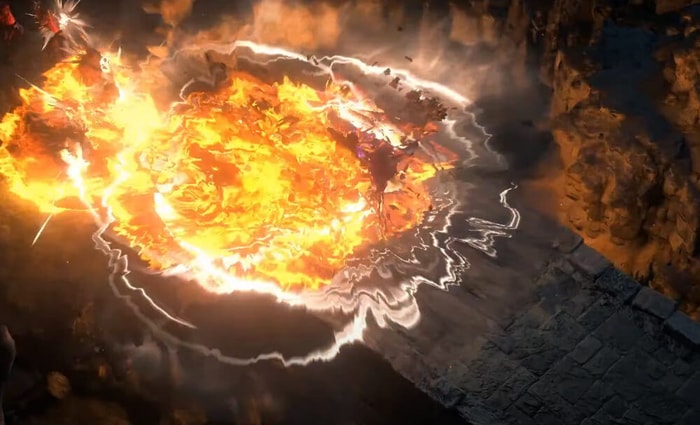
Boneshatter
This skill is used to explode packs of enemies that are primed for stuns. Use it after leap slam for a great clear speed.
Impact Shockwave – Defy – Reach – Magnified Effect
Earthshatter
This skill is for single-target damage. We use it for bosses and tougher rares. Stack some near the enemy and explode them with a seismic cry.
Upheaval – Splinter – Aftershock – Font of Rage – Reverberate
Hammer of the Gods
This skill is for heavy damage, but it can only be used after heavy stunning your enemy. Use it on bosses when available.
Fist of War – Heavy Swing – Exploit Weakness – Heft – Rageforged
Infernal Cry
This cry causes your next attack to deal a lot of extra damage. Use it before using the hammer of the gods.
Premeditation – Enraged Warcry – Raging Cry – Tireless
Seismic Cry
This cry causes enemies to be stunned more easily and grants an aftershock to your next attack. Also, use it before using the hammer of the gods. It only empowers your next attack if used on a heavily stunned enemy.
Dazing cry – Inspiration
Overwhelming Presence
This buff causes enemies to be stunned more easily.
Cannibalism – Herbalism
Herald of Ash
This buff increases our clear speed even more.
Clarity
Shield Charge
This skill is great for mobility.
Ingenuity
Jewels
Recommended Mods
Block Chance
Damage with Maces
Attack Damage
Area of Effect
Physical Damage
Rage on Hit
Melee Damage
Leveling
Part 1
At the start of Act 1, you begin with a rolling slam and your basic attack. The rolling slam is slow but is a good source of area damage. Remember that you can interrupt the animation. Hit the pack of enemies with the first blow, and if they die, keep walking to interrupt the rest of the animation. On level 6, you can also use a shockwave totem and infernal cry for more damage. Even though the clear speed is slow, you'll notice that bosses in Act 1 are pretty easy. With a rolling slam, you heavily stun them and deal a lot of damage.
Rolling Slam – Rage – Fist of War
Shockwave Totem – Brutality – Martial Tempo
Infernal Cry – Premeditation
Part 2
In Act 2, you'll keep using a rolling slam for single-target damage, but a leap slam will be your main source of clearing. You'll also count on Earthshatter for even more damage to bosses. That's when the clear speed starts being amazing. There's not much to say here. You need to point, click, and explode packs of enemies.
Rolling Slam – Heavy Swing – Rage
Shockwave Totem – Brutality
Infernal Cry – Premeditation – Raging Cry
Leap Slam – Martial Tempo – Momentum
Earthshatter – Splinter – Aftershock
Part 3
Reach Act 3, your life will be changed. As soon as you get level 41, you'll be able to use Stampede at a much faster and clearer speed. Activate Herald of Ice with the Polcirkeln ring and overwhelming presence for even more clear speed and heavy stun on bosses. Once you get your second set of ascendancy points, you need to equip a normal body armour (white). Reaching the cruel difficulty, you'll have access to all skills and start dropping level 3 support gems, so you'll be able to start molding your build, as the guide shows in the skill gem section of this post. Keep in mind that after picking "Giant's Blood" in your passive tree, you'll need to have enough strength to equip your weapon.
Rolling Slam – Heavy Swing – Rage – Aftershock
Infernal Cry – Premeditation – Raging Cry
Stampede – Reach – Momentum – Cold Infusion
Earthshatter – Splinter – Brutality – Martial Tempo
Herald of Ice – Magnified Effect – Primal Armament – Longshot
Overwhelming Presence
Leveling Items
Goldrim Felt Cap
Wanderlust Wrapped Sandals
Edyrn's Tusks Iron Cuirass
Hrimnor's Hymn Oak Greathammer
Agony Blow Studded Greatclub
Corpse Crusher Crumbling Maul
Polcirkeln Sapphire Ring
Rune Knell Heavy Greathammer
Conclusion
You can find out the detailed passive tree in Daniel's video. Remember, every build requires adaptation and experimentation to suit your playstyle, so take these foundations and make them your own. Kitava's strength is now yours—rise to the challenge and leave your mark on Wraeclast!